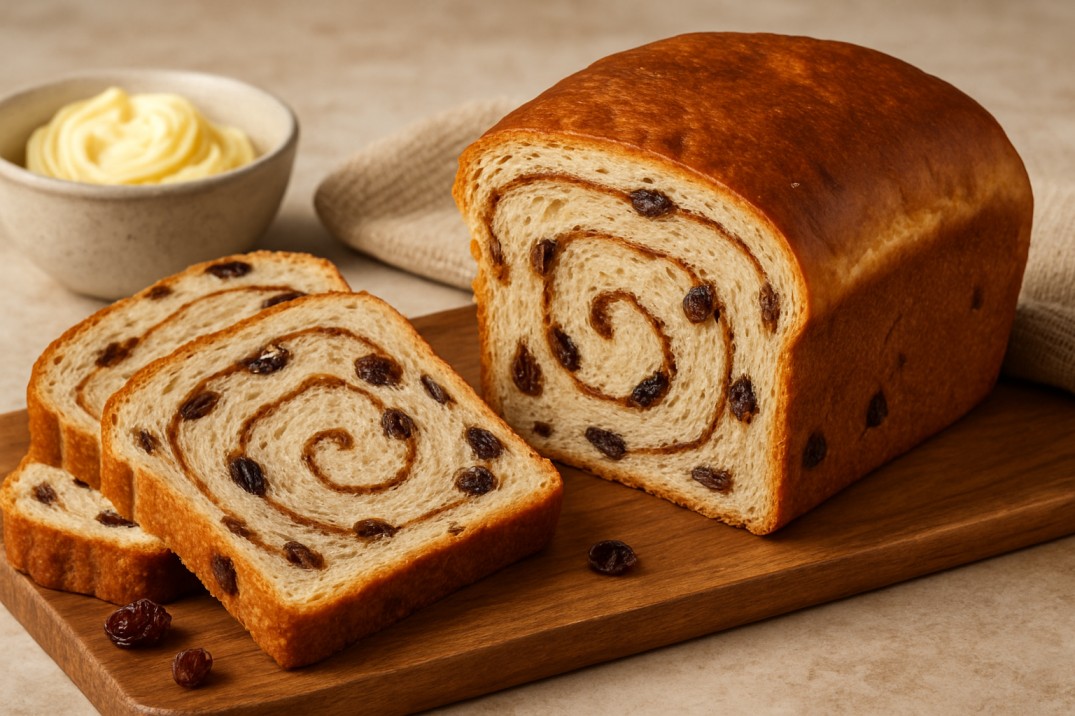
Homemade Cinnamon Raisin Bread – Soft, Sweet & Easy
There’s something magical about the aroma of homemade cinnamon raisin bread wafting through your kitchen. This recipe creates a perfectly soft, tender loaf swirled with warm cinnamon and studded with plump raisins. Even if you’re new to bread baking, you’ll find this recipe approachable and the results incredibly rewarding. The combination of sweet cinnamon and juicy raisins in a soft, pillowy bread makes for the perfect breakfast treat or afternoon snack.

Want to save this recipe for later?
I’ll email this recipe to you so you can easily find it again when you’re ready to bake! Email Me This RecipePrint Recipe
Why You’ll Love This Homemade Cinnamon Raisin Bread
- Perfectly soft, tender texture that stays fresh for days
- Warm cinnamon flavor with plump, juicy raisins in every bite
- Simple ingredients you likely already have in your pantry
- Detailed, beginner-friendly instructions for foolproof results
- Makes amazing toast, French toast, or bread pudding
- No special equipment required (though a stand mixer helps)
- Freezes beautifully for enjoying later
- Impressive homemade bread that’s actually easy to make
Ingredients for Homemade Cinnamon Raisin Bread

For the Dough:
- 3¼ cups all-purpose flour
- 2¼ teaspoons instant yeast (1 packet)
- ¼ cup granulated sugar
- 1 teaspoon salt
- 1 cup whole milk, warm (about 110°F)
- ¼ cup (4 tablespoons) unsalted butter, melted
- 2 large eggs, at room temperature
- 1 cup raisins
For the Cinnamon Filling:
- ½ cup brown sugar, packed
- 2 tablespoons ground cinnamon
- 2 tablespoons unsalted butter, softened
Optional Glaze:
- 1 cup powdered sugar
- 2 tablespoons milk
- ½ teaspoon vanilla extract
Equipment You’ll Need
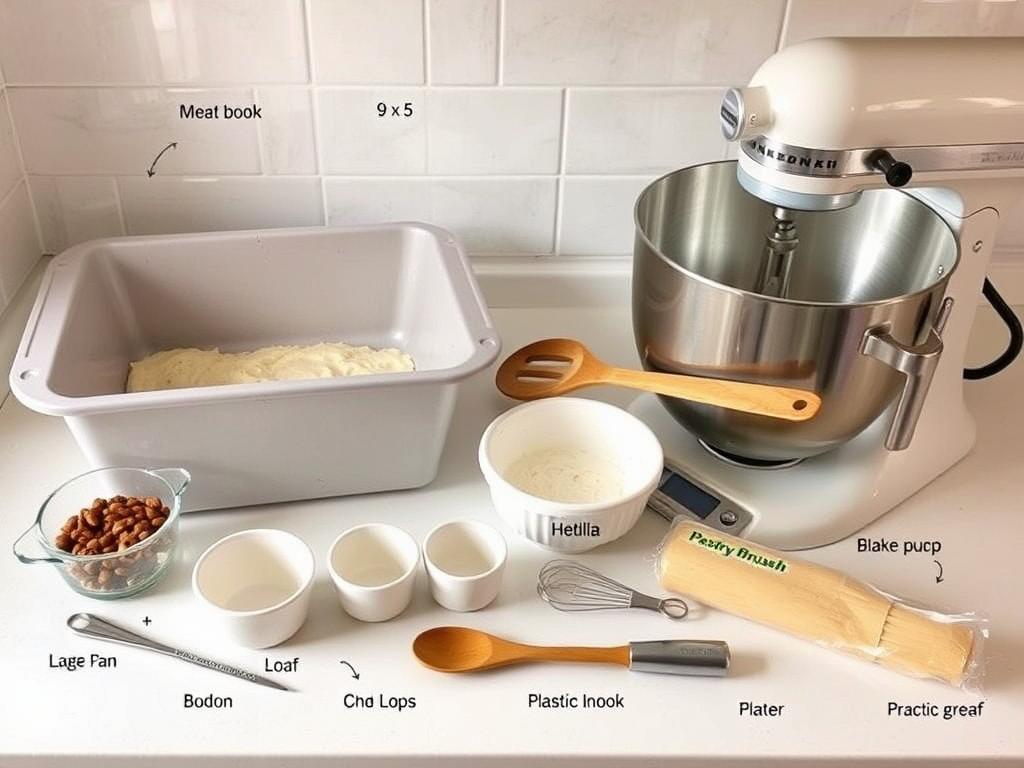
- 9×5-inch loaf pan
- Large mixing bowl
- Stand mixer with dough hook (optional but helpful)
- Measuring cups and spoons
- Rolling pin
- Pastry brush
- Plastic wrap
- Kitchen thermometer (optional)
Step-by-Step Instructions
Preparing the Dough

- Soak the raisins: Place raisins in a bowl and cover with hot water for 15 minutes. This plumps them up and prevents them from drawing moisture from your dough. Drain thoroughly before using.
- Activate the yeast: In a large bowl or the bowl of your stand mixer, combine warm milk (110°F), yeast, and 1 tablespoon of the sugar. Let sit for 5-10 minutes until foamy. If using instant yeast, you can skip this step and mix it directly with the dry ingredients.
- Mix wet ingredients: Add the melted butter, eggs, and remaining sugar to the yeast mixture and whisk to combine.
- Add dry ingredients: Mix in 3 cups of flour and salt. If using a stand mixer, use the dough hook on low speed. If mixing by hand, use a wooden spoon until a shaggy dough forms.
- Knead the dough: Knead for 8-10 minutes by hand on a lightly floured surface or 5-6 minutes with a stand mixer until the dough is smooth and elastic. Add the remaining ¼ cup flour as needed if the dough is too sticky.
- Add the raisins: Fold in the drained raisins until evenly distributed throughout the dough. This may take a few minutes.
First Rise

- First rise: Place the dough in a lightly oiled bowl, cover with plastic wrap or a damp kitchen towel, and let rise in a warm place for 1-1.5 hours, or until doubled in size.
Need more bread baking tips?
Join my newsletter for exclusive baking tips, troubleshooting advice, and new recipes delivered straight to your inbox!
Read More: Cheesy Garlic Chicken Wraps: The Ultimate Quick and Easy Comfort Meal
Shaping and Filling

- Prepare the filling: Mix brown sugar and cinnamon in a small bowl until well combined.
- Shape the dough: Punch down the risen dough and turn it out onto a lightly floured surface. Roll it into a rectangle approximately 9×18 inches.
- Add the filling: Spread the softened butter evenly over the dough, leaving a ½-inch border around the edges. Sprinkle the cinnamon-sugar mixture evenly over the butter.
- Roll the dough: Starting from the short end, tightly roll the dough into a log, pinching the seam and ends to seal.
- Place in pan: Place the rolled dough seam-side down in a greased 9×5-inch loaf pan.
Second Rise and Baking

- Second rise: Cover the pan loosely with plastic wrap and let rise in a warm place for 45-60 minutes, or until the dough has risen about 1 inch above the rim of the pan.
- Preheat oven: While the dough is rising, preheat your oven to 350°F (175°C).
- Bake: Bake for 35-40 minutes, or until the bread is golden brown and sounds hollow when tapped on the bottom. If the top is browning too quickly, tent with aluminum foil after 25 minutes.
- Check for doneness: The internal temperature should reach 190°F (88°C) when fully baked.
- Cool: Remove from the oven and let cool in the pan for 10 minutes, then transfer to a wire rack to cool completely before slicing.
Optional Glaze

- Make the glaze: If desired, whisk together powdered sugar, milk, and vanilla until smooth.
- Apply the glaze: Once the bread has cooled completely, drizzle the glaze over the top of the loaf.
Pro Tips for Perfect Homemade Cinnamon Raisin Bread

Key Success Factors
- Proper yeast activation: Ensure your milk is warm (110°F/43°C) but not hot, which would kill the yeast.
- Thorough kneading: Develop the gluten properly for a soft, chewy texture.
- Patience with rising: Don’t rush the rising process – proper proofing creates the best texture.
- Tight rolling: Roll the dough tightly for a beautiful swirl pattern without gaps.
Troubleshooting Common Issues
Why did my bread collapse in the middle?
This usually happens when the bread is undercooked or when the dough was over-proofed during the second rise. Make sure to bake until the internal temperature reaches 190°F and don’t let the second rise go too long – the dough should rise just above the pan rim.
Why are there gaps between my swirls?
Gaps typically form when the dough isn’t rolled tightly enough or when there’s too much filling. Roll the dough as tightly as possible and ensure the filling is spread evenly in a thin layer. Also, make sure to pinch the seams well to seal.
My raisins are all at the bottom of the loaf. What happened?
This can happen if the raisins aren’t thoroughly incorporated into the dough. Try mixing the raisins with a tablespoon of flour before adding them to the dough – this helps suspend them throughout the bread.
Delicious Variations for Your Cinnamon Raisin Bread

Nutty Cinnamon Raisin Bread
Add ½ cup of chopped walnuts or pecans to the filling for extra crunch and flavor. You can also mix some into the dough itself for a more pronounced nutty taste.
Orange Cinnamon Raisin Bread
Add the zest of one orange to the dough and soak the raisins in orange juice instead of water. This adds a bright, citrusy note that complements the cinnamon beautifully.
Cream Cheese Swirl Variation
Mix 8oz softened cream cheese with ¼ cup sugar and 1 egg yolk. Spread this mixture on the dough before adding the cinnamon-sugar for a decadent cream cheese swirl bread.
Serving Suggestions for Homemade Cinnamon Raisin Bread

Perfect Pairings
- Classic: Toasted with butter for breakfast
- Sweet Treat: Spread with cream cheese or mascarpone
- Decadent: Use for French toast with maple syrup
- Savory-Sweet: Pair with sharp cheddar cheese
Make-Ahead & Storage
- Room Temperature: Store in an airtight container for up to 3 days
- Refrigerator: Extends freshness to 5-7 days
- Freezer: Wrap tightly and freeze for up to 3 months
- Reheating: Toast from frozen or thaw overnight
Why You’ll Love This Homemade Cinnamon Raisin Bread

There’s something truly special about pulling a loaf of homemade cinnamon raisin bread from your oven. The swirls of cinnamon, the plump raisins, and that incredible aroma that fills your kitchen – it’s an experience that store-bought bread simply can’t match. This recipe strikes the perfect balance between simplicity and spectacular results, making it accessible even for novice bakers.
Whether you enjoy it as morning toast, afternoon snack, or transform it into decadent French toast for a weekend brunch, this homemade cinnamon raisin bread is sure to become a family favorite. The best part? You made it yourself, from scratch – and that’s something to be proud of!
Did you make this recipe?
I’d love to hear how it turned out! Leave a comment below and share your experience. Don’t forget to subscribe for more delicious recipes delivered straight to your inbox.Subscribe for More Recipes